 Business Management
 IT Services
 Business Management
 Business Analytics
 Business Analytics
 Business Analytics
 Best Credit Cards
 Best Credit Cards
 Best Credit Cards
How do I resize a banner in Photoshop? Learn how to resize a banner in Photoshop with step-by-step instructions and easy-to-follow tips. Perfect for beginners looking to quickly adjust their designs.
Step 1: Open Photoshop software on your computer and navigate to the "File" menu at the top left corner of the screen. Click on "Open" and select the banner image you want to resize.
Step 2: Once the image is opened, go to the "Image" menu and select "Image Size" from the drop-down menu. A dialog box will appear with several options for resizing the image.
Step 3: In the Image Size dialog box, you will see the current dimensions of your image in pixels. You can either manually adjust the width and height values to resize the banner, or you can select a preset size from the drop-down menu.
Step 4: It is important to maintain the aspect ratio of the banner to avoid distortion. To do this, ensure that the "Constrain Proportions" or "Maintain Aspect Ratio" box is checked. This will automatically adjust the height or width when you modify the other value.
Step 5: If you want to enlarge the image, simply increase the width or height value. Keep in mind that resizing an image to a larger size may result in loss of image quality. Conversely, if you want to reduce the size of the banner, decrease the width or height value accordingly.
Step 6: If you want to preview how your resized banner will look, click on the "Resample" box. This will allow you to see the changes in real-time without permanently applying them to the image.
Step 7: Once you are satisfied with the new size of your banner, click on the "OK" button to apply the changes. Photoshop will resize the image accordingly.
Step 8: To save your resized banner, go to the "File" menu and select "Save As" or "Save for Web". Choose a suitable file format such as JPEG or PNG, and select the destination folder for saving the image. Click on "Save" to finalize the process.
Resizing a banner in Photoshop is a relatively simple process, but it requires attention to detail to maintain the quality of the image. By following these steps, you can effectively resize your banner to fit your specific needs.
In conclusion, as a content creation and marketing expert, having the ability to resize banners in Photoshop is a valuable skill that can enhance your design capabilities. By mastering this process, you can ensure that your banners fit seamlessly into your marketing materials and effectively convey your message to your target audience.
To resize a banner in Photoshop, follow these steps: 1. Open the image file in Photoshop. 2. Go to the "Image" menu and click on "Image Size." 3. In the Image Size dialog box, enter the desired width and height for your resized banner. 4. Make sure the "Constrain Proportions" box is checked to maintain the aspect ratio. 5. Choose the resampling method based on your needs (e.g., Bicubic for smooth gradients). 6. Click "OK" to apply the resizing changes to your banner.
2. Can I resize a banner without distorting its proportions?Yes, you can resize a banner without distorting its proportions in Photoshop by following these steps: 1. Open the image file in Photoshop. 2. Go to the "Image" menu and click on "Canvas Size." 3. In the Canvas Size dialog box, enter the desired width and height for your resized banner. 4. Make sure the "Relative" box is checked to resize the canvas without changing the image inside. 5. Click on the anchor icon that represents the side you want to extend or contract (e.g., center for proportional resizing). 6. Click "OK" to apply the canvas resizing changes to your banner, which will maintain its original proportions.
3. How can I resize a banner for a specific online platform or social media site?To resize a banner for a specific online platform or social media site in Photoshop, you need to know the dimensions required by that platform. Here's how you can do it: 1. Find out the recommended banner dimensions for the platform or site you intend to use. 2. Go to the "Image" menu and click on "Image Size" in Photoshop. 3. In the Image Size dialog box, enter the recommended dimensions for the platform. 4. Make sure the "Constrain Proportions" box is checked to maintain the aspect ratio. 5. Choose the resampling method based on your needs. 6. Click "OK" to resize your banner according to the required dimensions.
4. Can I resize a banner using a specific percentage instead of pixel dimensions?Yes, you can resize a banner using a specific percentage instead of pixel dimensions in Photoshop by following these steps: 1. Open the image file in Photoshop. 2. Go to the "Image" menu and click on "Image Size." 3. In the Image Size dialog box, make sure the "Constrain Proportions" box is checked. 4. Enter the desired percentage increase or decrease in the "Width" and "Height" fields. For example, enter 150% to increase the size by 50%. 5. Choose the resampling method based on your needs. 6. Click "OK" to apply the percentage-based resizing to your banner.
5. Will resizing a banner in Photoshop affect its image quality?Resizing a banner in Photoshop can affect its image quality depending on the method used and the extent of resizing. Generally, reducing the banner's size can result in a loss of some image details and sharpness. Increasing the size too much can lead to pixelation and blurriness. To minimize the impact on image quality, it's recommended to resize within a reasonable range and choose the appropriate resampling method, such as Bicubic for smooth gradients or Preserving Details for upsampling.
 LATEST ARTICLES
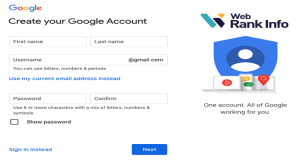
Are Google accounts free to make?
Are three types of strategies that organizations can use to adapt to enviro..
Can a single-member LLC add a second member later in Texas?
Can I do my masters in USA without GRE?
Can I be a data analyst if I'm bad at math?
Are two techniques used in descriptive analytics?
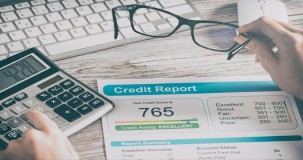
Are closed accounts good on your credit report?
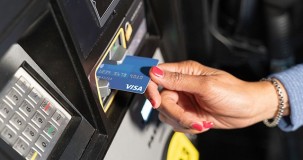
Can a Visa card be used for gas?
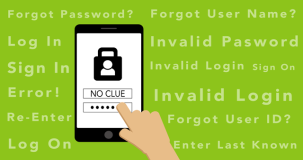
Are user name and user ID the same?
Can I find my UTR number online?

Do I need to get my car inspected before registration in SC?

Am I at risk if someone has my bank statement?
 POPULAR ARTICLES
Are Google accounts free to make?
Are three types of strategies that organizations can use to adapt to enviro..
Can a single-member LLC add a second member later in Texas?
Can I do my masters in USA without GRE?
Can I be a data analyst if I'm bad at math?
Are two techniques used in descriptive analytics?
Are closed accounts good on your credit report?
Can a Visa card be used for gas?
Are user name and user ID the same?
Can I find my UTR number online?
 Facebook
  Twitter
  Whatsapp
  Tumbler
  Pinterest