 Business Management
 IT Services
 Business Management
 Business Analytics
 Business Analytics
 Business Analytics
 Best Credit Cards
 Best Credit Cards
 Best Credit Cards
Como enviar um E-mail pelo Mautic? To send an email through Mautic, follow these steps: 1. Log in to your Mautic account. 2. Click on the "Channels" tab. 3. Select "Emails" from the drop-down menu. 4. Click on the "New" button to create a new email. 5. Fill in the email details, such as the subject, sender name, and sender email address. 6. Use the email editor to design the content of your email. You can add text, images, links, and other elements as desired. 7. Once you have finished creating the email, click on the "Save & Close" button to save your changes. 8. To send the email to your contacts, you can either create a segment and add the segment to the email, or you can manually select the contacts to receive the email. 9. After selecting the recipients, click on the "Send" button to send the email.
Step 1: Log in to your Mautic account: To get started, log in to your Mautic account using your username and password. If you don't have an account, you can sign up for a free trial on the Mautic website.
Step 2: Create a new email: Once you're logged in, navigate to the "Emails" section in the left-hand menu. Click on "New" to create a new email.
Step 3: Choose a template: Mautic offers a variety of pre-designed email templates that you can choose from. Select a template that best suits your needs or start from scratch if you prefer a custom design.
Step 4: Customize your email: After selecting a template, you can customize it by adding your own text, images, and branding elements. Mautic provides an easy-to-use drag-and-drop editor that allows you to easily arrange your content.
Step 5: Personalize the email: One of the key features of Mautic is its ability to personalize emails based on the recipient's information. You can use dynamic content tags to insert contact details such as name, company, or any other data you have collected.
Step 6: Set email settings: Before sending the email, make sure to set the email subject, sender name, and sender email address. You can also schedule the email to be sent at a specific date and time or send it immediately.
Step 7: Preview and test: It's always a good idea to preview and test your email before sending it to your entire contact list. Mautic allows you to send a test email to yourself or a specific contact to ensure everything looks and works as intended.
Step 8: Select your audience: Mautic provides advanced segmentation options that allow you to target specific groups of contacts. You can segment your list based on various criteria such as demographics, behavior, or engagement level.
Step 9: Send the email: Once you have customized your email, set the email settings, and selected your audience, you are ready to send the email. Click on the "Send" button to start the sending process.
Step 10: Track and analyze: After sending the email, Mautic provides insightful analytics to track its performance. You can see metrics such as open rates, click-through rates, and conversion rates to evaluate the effectiveness of your email campaign.
By following these steps, you can effectively send an email using Mautic. Remember to continuously optimize your email campaigns based on the analytics and feedback you receive to improve your marketing efforts.
To set up email sending in Mautic, you need to first configure your email settings. Go to the configuration menu, select "Email Settings," and enter the necessary information such as SMTP server, port, username, and password. Once the email settings are configured, you can send emails through Mautic using the specified SMTP server.
2. Can I personalize emails sent through Mautic?Yes, Mautic allows you to personalize emails by adding dynamic content based on the contact's information. You can use tokens to insert personalized data such as the contact's name, email address, or any other custom fields you have set up. This helps create a more personalized and engaging email communication with your contacts.
3. How can I create an email template in Mautic?To create an email template in Mautic, go to the emails menu and select "New Email." You can either start from scratch or choose from pre-designed templates. Use the drag-and-drop editor to customize the layout, add text, images, buttons, and other elements. Once you are satisfied with the template, save it and use it as a basis for your future email campaigns.
4. Can I test my emails before sending them out in Mautic?Yes, Mautic provides a testing feature that allows you to send test emails to yourself or any other specified email address. This helps you preview how the email will appear in the recipient's inbox and ensure it looks and functions as intended. By testing emails before sending them out, you can catch any potential errors or formatting issues and make necessary adjustments.
5. How can I track the performance of my sent emails in Mautic?Mautic provides detailed analytics and reporting capabilities to track the performance of your sent emails. You can see metrics such as open rates, click-through rates, bounce rates, and conversions. These insights help you measure the effectiveness of your email campaigns, identify areas for improvement, and optimize your future email marketing strategies.
 LATEST ARTICLES
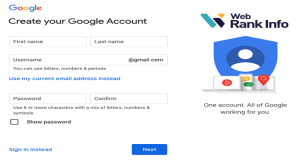
Are Google accounts free to make?
Are three types of strategies that organizations can use to adapt to enviro..
Can a single-member LLC add a second member later in Texas?
Can I do my masters in USA without GRE?
Can I be a data analyst if I'm bad at math?
Are two techniques used in descriptive analytics?
Are closed accounts good on your credit report?
Can a Visa card be used for gas?
Are user name and user ID the same?
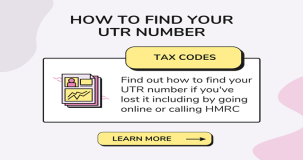
Can I find my UTR number online?

Do I need to get my car inspected before registration in SC?

Am I at risk if someone has my bank statement?
 POPULAR ARTICLES
Are Google accounts free to make?
Are three types of strategies that organizations can use to adapt to enviro..
Can a single-member LLC add a second member later in Texas?
Can I do my masters in USA without GRE?
Can I be a data analyst if I'm bad at math?
Are two techniques used in descriptive analytics?
Are closed accounts good on your credit report?
Can a Visa card be used for gas?
Are user name and user ID the same?
Can I find my UTR number online?
 Facebook
  Twitter
  Whatsapp
  Tumbler
  Pinterest