 Business Management
 IT Services
 Business Management
 Business Analytics
 Business Analytics
 Business Analytics
 Best Credit Cards
 Best Credit Cards
 Best Credit Cards
How do I enter a SBA loan into QuickBooks? Learn how to efficiently enter SBA loan details into QuickBooks with this easy-to-follow guide. Track your loan accurately and stay organized!
Step 1: Set up a liability account
Before entering your SBA loan into QuickBooks, you need to create a liability account to track the amount you owe. To do this, go to the Chart of Accounts and click on "New" to add a new account. Choose "Long-Term Liabilities" as the account type and give it a distinctive name, such as "SBA Loan." Set the opening balance to zero since you haven't received the loan yet.
Step 2: Enter the loan funds
Once you receive the funds from your SBA loan, you need to record it in QuickBooks. To do this, go to the Banking menu and select "Make Deposits." Choose the account where you deposited the loan funds, enter the date, and select the liability account you created in Step 1 as the source account. Enter the loan amount as a positive number and save the deposit.
Step 3: Set up a loan account
Next, you need to set up a loan account in QuickBooks to track the loan principal and interest payments. Go to the Chart of Accounts and click on "New" to create a new account. Choose "Long-Term Liabilities" as the account type and give it a unique name, such as "SBA Loan Payable."
Step 4: Record the loan disbursement
In this step, you need to record the disbursement of the loan amount from your SBA loan account. Go to the Banking menu and select "Write Checks." Choose the account from which you made the loan disbursement and enter the date and payee information. In the expense tab, select the loan account you created in Step 3 and enter the loan amount as a positive number. Save the check once you have entered all the required information.
Step 5: Record loan payments
As you make payments towards your SBA loan, you need to record them in QuickBooks to track your loan balance accurately. To do this, go to the Banking menu and select "Write Checks." Choose the account you used to make the payment, enter the date and payee information, and select the loan account you created in Step 3. Enter the payment amount as a negative number and save the check.
Step 6: Record loan interest
If your SBA loan accrues interest, you need to record it separately in QuickBooks. To do this, go to the Banking menu and select "Write Checks." Choose the account from which you paid the interest expense, enter the date and payee information, and select an appropriate expense account to categorize the interest payment. Enter the interest amount as a positive number and save the check.
By following these steps, you can accurately enter your SBA loan into QuickBooks and keep track of your loan balance, payments, and interest in an organized manner. It is essential to ensure that you record all the loan transactions accurately to maintain proper financial records and prepare accurate financial statements. Properly managing your loan information in QuickBooks will help you stay on top of your financial obligations and make informed decisions for your business.
To set up a new loan account in QuickBooks for an SBA loan, follow these steps: 1. Go to the "Lists" menu and select "Chart of Accounts." 2. Click on the "Account" button and choose "New" from the drop-down menu. 3. Select "Long Term Liabilities" as the account type and click "Continue." 4. Provide a name for the loan account and enter the amount of the loan. 5. Set up an opening balance for the loan as of the loan start date. 6. Choose the appropriate tax line mapping if necessary. 7. Click "Save & Close" to complete the setup of the new loan account.
2. How do I record loan proceeds in QuickBooks for an SBA loan?To record loan proceeds in QuickBooks for an SBA loan, follow these steps: 1. Go to the "Banking" menu and select "Make Deposits." 2. Choose the appropriate bank account where the loan funds were deposited. 3. Enter the date of the deposit and select the appropriate SBA loan account from the "Received From" drop-down menu. 4. Enter the loan amount as a positive value in the "Amount" column. 5. Add any additional information or memo if required. 6. Click "Save & Close" to record the loan proceeds in QuickBooks.
3. How can I set up loan payments in QuickBooks for an SBA loan?To set up loan payments in QuickBooks for an SBA loan, follow these steps: 1. Go to the "Banking" menu and select "Write Checks." 2. Choose the appropriate bank account from which the loan payments will be made. 3. Enter the date of the payment and select the appropriate SBA loan account in the "Pay to the Order of" field. 4. Enter the loan payment amount as a negative value in the "Amount" column. 5. Add any necessary memo or description for the loan payment. 6. Click "Save & Close" to record the loan payment in QuickBooks.
4. How do I track interest expense for an SBA loan in QuickBooks?To track interest expense for an SBA loan in QuickBooks, follow these steps: 1. Go to the "Banking" menu and select "Write Checks." 2. Choose the appropriate bank account from which the interest payments will be made. 3. Enter the date of the interest payment and select the appropriate expense account for interest expense. 4. Enter the interest payment amount as a negative value in the "Amount" column. 5. Add any necessary memo or description for the interest payment. 6. Click "Save & Close" to record the interest expense in QuickBooks.
5. How can I reconcile my SBA loan account in QuickBooks?To reconcile your SBA loan account in QuickBooks, follow these steps: 1. Go to the "Banking" menu and select "Reconcile." 2. Choose the appropriate loan account from the drop-down menu. 3. Enter the ending statement balance and the ending date from your loan statement. 4. Match the transactions listed in the loan account with those on your loan statement. 5. Ensure that the ending balance matches the statement balance and click "Finish Now" to complete the reconciliation process.
 LATEST ARTICLES
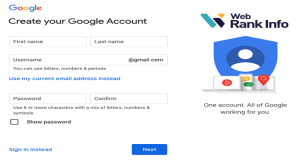
Are Google accounts free to make?
Are three types of strategies that organizations can use to adapt to enviro..
Can a single-member LLC add a second member later in Texas?
Can I do my masters in USA without GRE?
Can I be a data analyst if I'm bad at math?
Are two techniques used in descriptive analytics?
Are closed accounts good on your credit report?
Can a Visa card be used for gas?
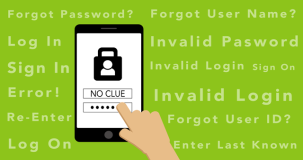
Are user name and user ID the same?
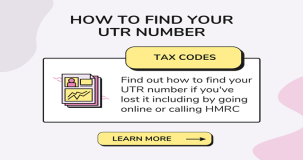
Can I find my UTR number online?

Do I need to get my car inspected before registration in SC?

Am I at risk if someone has my bank statement?
 POPULAR ARTICLES
Are Google accounts free to make?
Are three types of strategies that organizations can use to adapt to enviro..
Can a single-member LLC add a second member later in Texas?
Can I do my masters in USA without GRE?
Can I be a data analyst if I'm bad at math?
Are two techniques used in descriptive analytics?
Are closed accounts good on your credit report?
Can a Visa card be used for gas?
Are user name and user ID the same?
Can I find my UTR number online?
 Facebook
  Twitter
  Whatsapp
  Tumbler
  Pinterest